The Handle Test: Choosing Kitchen Hardware That Survives Real Life

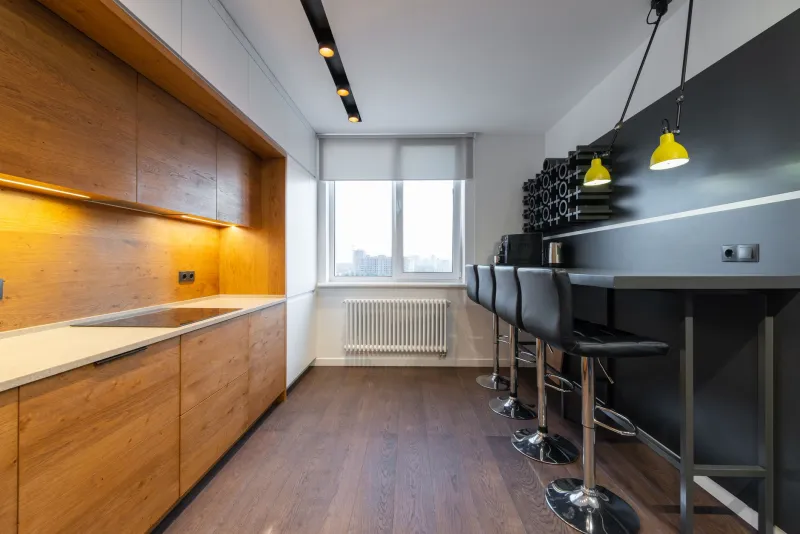
Photo: Ymblanter, CC BY-SA 4.0, via Wikimedia Commons
There's a point in every kitchen project where the design stops being a moodboard and starts being a series of small physical negotiations. Where does the bin go, how far does the oven door swing, and — the one nobody puts on the spreadsheet — what exactly are you going to grab hold of when your hands are wet, floury or carrying a full saucepan?
Hardware is the cheapest line on the quote and the one you'll have the longest relationship with. A worktop might get resealed once a year; a drawer pull gets operated a few dozen times a day by every person in the house. So it's worth a proper think rather than a five-minute flick through the samples box at the end of a showroom visit.
Handleless doesn't mean hands-free
The handleless route has been the default "modern" answer for well over a decade now, and it does look superb — a continuous run of cabinetry with nothing interrupting the line. But handleless is a family of solutions, not a single one, and they behave quite differently.
An integrated J-profile routed into the door gives you a groove to hook your fingers into. Lovely to use, but that channel collects crumbs and cooking grease, and it's the sort of detail you end up cleaning with a cloth wrapped around a thumbnail. Push-to-open latches are elegant until someone with sticky hands leans on a door, or until the mechanism starts to soften after a few years of being slammed by a teenager. And a true recessed rail — where the door sits proud of a metal channel — is the most forgiving of the lot, but it needs planning at the carcass stage and it isn't cheap.
None of these are bad choices. They just aren't the maintenance-free option people imagine. If you like the look, go for it, but go in knowing that "handleless" usually means "cleaned in a slightly more fiddly way".
Finger room is a measurement, not a vibe
This is where most handle decisions quietly go wrong, and it has nothing to do with style.
A protruding pull adds roughly 25–35mm to the depth of a door or drawer front. In a generous kitchen that's irrelevant. In a narrow galley, beside a wall, or next to a tall larder unit that opens to ninety degrees, it can turn a comfortable room into an obstacle course — and it's the reason so many people end up with belt loops caught on bar handles as they sidle past the fridge.
A few things to check before you commit:
- Tall units and corner runs. Two doors that meet at a right angle with chunky knobs on both will clatter. Consider a slim pull on one side, or set the hardware low and high so the swing paths miss each other.
- The window reveal and the sink. A mixer tap that arcs forward plus a handle that juts back is a surprisingly common collision.
- Drawer stacks under a worktop overhang. If the worktop overhangs by 20mm and the pull protrudes by 30mm, that top drawer catches knuckles every time.
- Appliances. Integrated fridge doors, dishwashers and oven doors all have their own projecting furniture. Make sure your chosen hardware sits comfortably alongside them rather than fighting them.
It's genuinely worth mocking this up with tape on the existing cabinets. Five minutes with a ruler now saves a decade of annoyance.
Pulls, knobs and the physics of a wet hand
A bar pull lets your whole hand wrap around it, which is why it works so well on wide pan drawers and anything heavy. A knob is prettier and often cheaper, but it's a pinch grip — fine for a cupboard door, less pleasant on a 900mm drawer full of cast iron.
A rough rule that holds up well in practice: the bigger and heavier the thing that moves, the more handle it deserves. Long, horizontal pulls on drawer banks. Knobs or small cup pulls on cupboard doors. D-shaped pulls on integrated appliances, where the door itself offers no natural grip.
Cup pulls and edge pulls are worth a look if you want something between the two — the cup gives you a decent hold without the protrusion of a bar, and it reads as a slightly softer, more traditional detail even in a contemporary scheme.
Match the finish to the metals you'll actually live with
Here's the thing about brushed brass: it looks wonderful in isolation and completely different next to a stainless steel range cooker, a black glass hob and a chrome tap. Your kitchen is already full of metals, and your hardware has to be friends with all of them.
Take a sample handle to the appliance showroom. Or better, take the appliance brochure home and hold the handle against it in your own kitchen light — which will be nothing like the showroom's spotlights. Warm metals like aged brass and bronze sit happily with oak, painted cabinetry and stainless steel. Cooler nickel and chrome want cooler schemes. Matt black is striking but shows every fingerprint and every fleck of dust, particularly on a flat powder-coated surface.
Speaking of powder coat: it chips. Not often, not dramatically, but on the leading edge of a much-used handle it will eventually show a small silver scar. Unlacquered brass does the opposite — it dulls and darkens and, in most kitchens, looks better for it. Decide which of those two ageing processes you'd rather live with.
The forty-centimetre problem
Anything within about 40cm of the hob is going to get a light film of cooking grease on a weekly basis. Ornate detailing, deep grooves and textured finishes are all lovely until you're working a cloth into them.
Simple shapes clean up faster. That's the whole argument. If you've set your heart on something decorative, put it on the larder and the display cupboards, and keep the working triangle — sink, hob, prep — in something you can wipe in one pass.
Small hands, big bags and the daily scrum
If there are children in the house, look for rounded returns and no sharp machined edges at grabbing height. If there's a busy thoroughfare past the units, favour low-profile pulls over anything that hooks. If more than one person cooks, standardise: one handle style for drawers, one for doors, and a consistent drill centre throughout, so nobody's muscle memory has to recalibrate at 7am.
And buy spares. Two or three extra handles in the same finish, kept in a drawer, will save you a small fortune in five years when one works loose or a fixing strips.
Decide before the doors are ordered
Handle centres — 96mm, 128mm, 160mm and so on — are drilled into the door at manufacture. Change your mind after fitting and you're either re-drilling (visible, ugly) or replacing the fronts. So the handle isn't a finishing touch to be chosen at the end. It's part of the door specification.
Buy one sample, fix it temporarily to a cupboard you already own, and use it for a week. Open it with oven gloves on. Open it with wet hands. Open it while holding a toddler. If it still feels good after seven days, it'll feel good in 2036.